

Getting going for real. Starting with the service module...

The service module is done and then there are superstructure rods to fix around it.
Shown in the background is the PDF on my Surface Go
tablet (this has a handy kickstand and is ideal for this
sort of thing!)

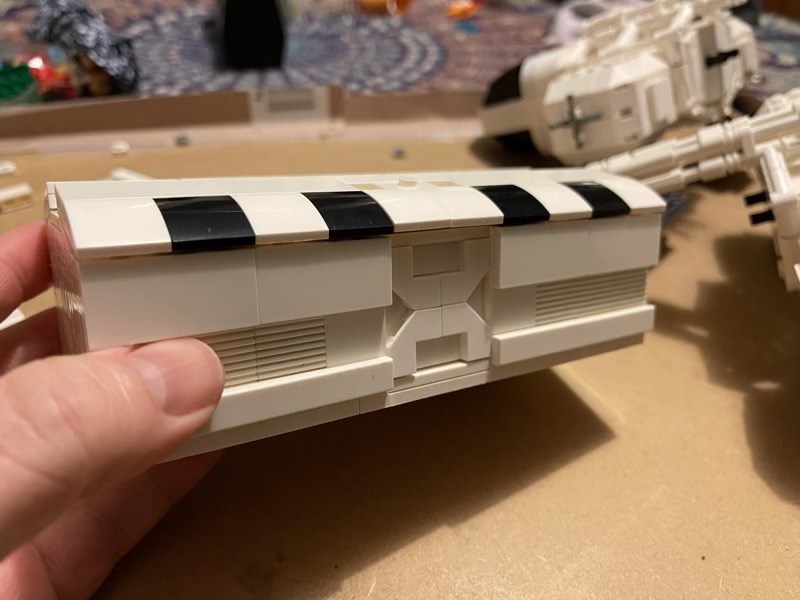
Another shot of the service module, in profile, showing the layout.
Note the three holes, these will have pins for fixing onto
passenger module and the engine module.

Time to build four landing leg modules now! All are the same,
so quick to make.

Then the 'back' of the Eagle, though note that this isn't
structural at ALL. The Eagle's modules are instead 'bolted'
together with the aforementioned pins.

The completed parts so far on my makeshift work surface. (I put
in raised edges to stop small pieces from getting lost!)

Detail of one of the landing leg modules - nice little mock
suspension joint, though note that the legs are fixed - there
are no springs. Shame!

Two of the leg modules connected to the service (or utility)
module. These mid-front and mid-back modules are identical, by
the way.

Time for the fun bits. Building the command module here out of
black bricks!

The back of the command module shows more pins, which will hold it fast onto the utility module.
(There's no 'door' shown, though you get a sense of scale from
the doors in the passenger module.)

The MOC kit was supposed to have a roll of white tape to wrap around the command module, as per the original TV Eagle colouring.
It was missing on mine, so I improvised with sections of old
sticky labels! I used some yellow labels for the windows,
typically lit up kind of like this on TV.

Building the engine module. Feel the power!

This module was the most fiddly, all the little parts and connections. It's also the most fragile in the finished model.
Do NOT let little kids play with your Eagle!

Ringed here on the instructions are some decalled (computer)
bricks, but they were missing from my MOC, sadly.

So I improvised with some spare bricks from my brick bucket. I can always go back later and print my own decals, I think.
(Note the brown chairs are positioned wrongly - I noticed and
fixed this shortly after!!)

The partially built view down the passenger module towards the
front, showing storage lockers and more, plus an impressive
looking sliding door (it doesn't in the model!) into the utility
module.

Similarly, looking back in the passenger module towards the service module. The seats are now positioned properly, giving plenty of room for the crew to sit down and relax!
Orange here was my choice for the computer systems. Again, some
decals needed, I think.

Building the hinged passenger module roof...

In place and looking splendid - one completed passenger module!

Underneath, the original plan called for just the four booster jets, but I felt more was needed.
Figuring that a 'real' Eagle passenger module would need to be set down sometimes on its own, I put in a makeshift, combination feet/winch system. Or whatever you might imagine. Things that can be attached to the underside if needed, and this odd grey brick section seemed just the right degree of 'utilitarian'!
Eh voila. One Space 1999 Eagle. Here shown landed on an alien
planet. No, really...

You can contact me at [email protected] and you can 'tip' me if these pages have proved helpful to you by using PayPal. Thanks.